Go to the Startup apps by searching it in the Windows search bar. Find the programs you want to change and select Enable or Disable.
Where is the Windows Startup Folder in Windows 10? Easy Guide for Beginners
Updated on: Mar 13, 2025
The Windows Startup folder controls which programs launch automatically when you start your computer. While it is not as prominent as it once was, it is still accessible and useful.
If you want to stop certain programs from operating at startup or add your own, you will need to find the folder. However, it is hidden deep in the system.
In this quick and easy guide, we will show you where to find the Startup folder in Windows 10, how to access it using various ways, and how to manage programs in it effectively.
What is the Windows Startup Folder?
The Windows Startup Folder is a special folder where you can place programs you want to launch automatically when your computer starts. Unlike other system startup processes, the folder only contains apps that you manually add.
If you want a program to open every time Windows starts, simply add it to this folder. If you no longer want it to start automatically, just remove it. We will discuss the step-by-step process involved in the latter part of this blog.
The Win Startup Folder is different from the Startup tab in Task Manager, which lets you enable or disable startup programs but does not allow you to add or remove them from the system’s startup list.
How to Access the Windows 10 Startup Folder? – 4 Simple Ways
Where is the Windows 10 Startup Folder? Well, there are multiple ways to find and open the Startup folder. Here are four of the quickest and easiest methods:
Method 1: Find Windows Startup Folder Location Using File Explorer
File Explorer is the easiest way to navigate files and folders in Windows PC. To access Windows 10 Startup Directory:
- Open File Explorer by pressing Win + E.
- Now, click on the address bar, type “C:\ProgramData\Microsoft\Windows\Start Menu\Programs\StartUp”, and press Enter.
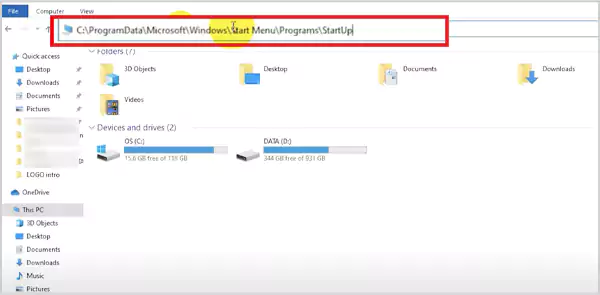
This will instruct your system to open the Startup Directory Windows 10 instantly. Let’s move on to the next method.
Method 2: Access Win 10 Startup Folder Via Run Command
The second method to find the Startup folder in Windows 10 is to use the Run Command. It is one of the fastest ways to access the folder; just follow the given steps:
- Press Win + R to open the run box on your screen.

- Here, type shell:startup and press Enter.

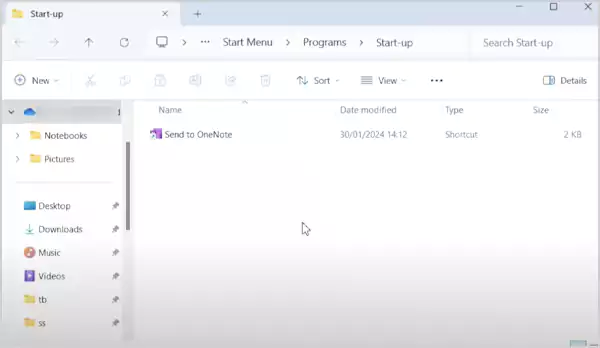
Now, the Windows 10 Startup folder will appear on your screen. You can add or remove the apps you want to start automatically.
Method 3: Locate Windows 10 Startup Folder Using Task Manager
Task Manager lets you open files and folders easily. It controls processes and all the background activity of your computer. Here’s how to use it to find the Startup Folder in Win 10:
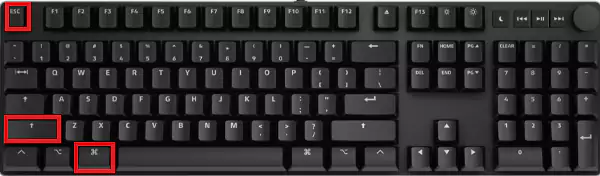
- Press Ctrl + Shift + Esc to open Task Manager. Alternatively, you can right-click the Taskbar and select Task Manager.
- Click on Run new task at the top, type shell:startup, and just hit Enter.

This is how easily you can find and open the Startup folder using the Task Manager.
Method 4: Access Win10 Startup Folder Using a Desktop Shortcut
To make it more convenient, you can make a desktop shortcut. It will allow you to open the Startup folder with a simple double-click. Here’s how to create one:
- Press Win + D to go to the desktop.
- Right-click on a space and select New > Shortcut.

- In the location field, type or paste: %AppData%\Microsoft\Windows\Start Menu\Programs\Startup

- Click Next, give it a name, and hit Finish.
Now, you can open the Startup folder anytime by double-clicking the shortcut on your desktop.
How to Add or Remove Programs in the Startup Folder in Windows 10?
Now that you know where to find the Windows Startup Folder, let’s see how to manage it effectively to improve your computer experience.
1. Adding a Program to the Startup Folder
To make a program start automatically when your computer boots up:
- Right-click the program you want to add and select Copy.
- Now, open the Startup folder by following one of the methods mentioned in this blog.
- Finally, just paste the program into the Startup folder and restart your computer.

2. Removing a Program from the Startup Folder
To stop a program from launching at startup:
- Press Win + R, type shell:startup, and click on OK to access the Startup folder.
- Here, right-click the program you want to remove and select the Delete option.
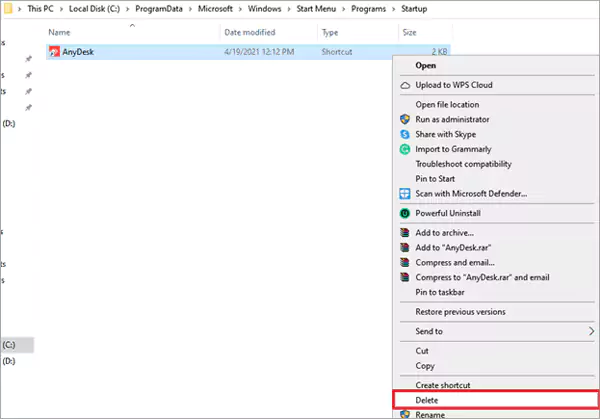
That’s it! Your change will take effect the next time you restart or reboot your computer system.
Top Fixes to Resolve Windows 10 Startup Folder Not Working
Startup folders not working or running automatically when you start your computer is a common issue and can be fixed easily. Here are some simple fixes you can try:
1. Enable Startup Apps in Task Manager
Sometimes, your apps get disabled from starting up; here’s how you can check this:
- Press Ctrl + Shift + Esc to open the Task Manager.
- Click the Startup tab and look for the app that’s not launching.
- Now, if it is disabled, right-click and select Enable.
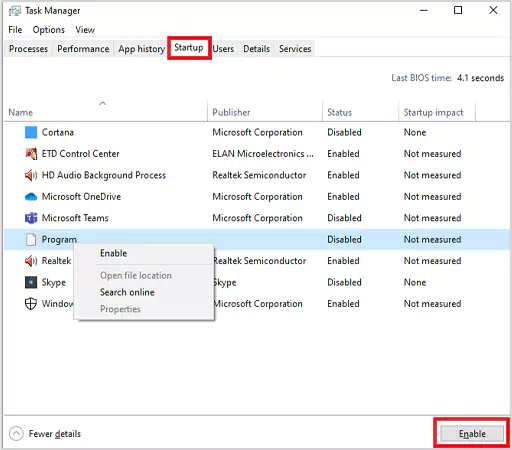
Finally, just restart your computer and see if the issue is fixed or not.
2. Use a Batch File to Launch the App
You can create a small script to force the app to run at startup. Follow the given steps to do so:
- Open Notepad and type:
@echo off
C:\Program Files (x86)\Dropbox\Client\start Dropbox.exe
Exit
[You can replace the path with your app’s location.]

- Click on File > Save as, name it something like ‘xyz.bat’, and choose All Files as the file type.

- Save it in the Startup folder by navigating to the shell:startup location.
This will help you run your app when your system starts.
3. Add the Apps via Windows Registry
If nothing else works, you can add the app through the Windows registry.
- Press Windows + R, type regedit, and hit Enter.
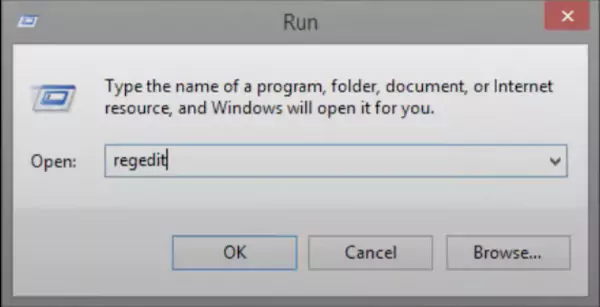
- Go to this location:
HKEY_LOCAL_MACHINE\Software\Microsoft\Windows\CurrentVersion\Run
- Right-click on an empty space and click on New > String Value.

- Name it the same as your app.
- Double-click it and paste the app’s .exe. File path under ‘Value Data’.

Now, just click OK, close Registry Editor, and restart your PC.
Furthermore, if the Startup Folder is still not working, you can try to use the Startup Repair Tool from Advanced Startup Options and restart your PC. You can also try to run the System Maintenance Troubleshooter or update your Windows version.
Final Words
The Windows Startup folder makes it easy to manage which programs launch automatically. We have mentioned several ways to find and access the Startup folder in Windows 10 and Windows 11.
We hope that this information will be helpful for you to manage the Startup folder effectively. Please share it with your friends and family who may need to know this.
Frequently Asked Questions
How do I change what programs run at Startup?
Where is the Windows Start Menu folder?
In most of the Windows versions, the folder is located in “%appdata%\Microsoft\Windows\Start Menu” for individual users or “%programdata%\Microsoft\Windows\Start Menu” for the shared portion of the menu.
Where to find the Startup folder in Windows 10?
You can find the Startup folder with the following directory address:
C:\ProgramData\Microsoft\Windows\Start Menu\Programs\StartUp.

Related Posts

8 Best AI Presentation Makers for Business-Ready Slides
Making a presentation doesn’t just mean designing slides. It’s about defining a clear structure, using defined logic, useful visuals, and…

Queue Management Software Troubleshooting Guide: 8 Common Faults and Fixes
The long wait times and ineffective management of customer queues can have a significant impact on customer satisfaction and business…

How to Use Similarweb Website Traffic Data for Competitor Research
Competitor research without traffic data is guesswork. You can guess who your rivals are, guess how big they are, guess…

Choosing the Right Hosting Model for Scalable Digital Platforms
The performance of digital business is directly related to website speed, uptime, and scalability. Slow page performance has a negative…

How Data-Driven Performance Tools Are Transforming Employee Recognition in Tech Companies
“People work for money but go the extra mile for recognition, praise, and rewards.” — Dale Carnegie (Writer & Teacher)…

Why Businesses Struggle to Collect Reliable Data from the Web
Almost every company that depends on data runs into the same problem: although they can find the data they need,…

Why Financial Data Recovery Matters for Businesses
Financial data supports every part of a business, directly affecting cash flow, payroll, tax reports, audits, customer billing, and daily…

CMMC Compliance Is Coming for Manufacturers. Here Is What You Need to Do
“Cybersecurity is much more than a matter of IT.” — Stephane Nappo (Cybersecurity Professional) For manufacturers working within the defense…

How Data-Based Tools Influence Learning Performance
Learning has transformed in the modern age with the integration of new technologies to help students and professionals prosper in…