The snipping tool shortcut for Windows is the Windows logo key + Shift + S for a static image capture and the Windows logo key + Shift + R for a video capture.
How to Take Screenshot on Windows 11? Using the Built-in Windows Snipping Tool and Other Options
Updated on: Oct 04, 2024
Taking a screenshot on Windows 11 will not require working your fingers to the bone. It’s a simple process that can be done with several shortcuts, regardless of the Windows OS version you’re using.
The Windows snipping tool is surely the obvious one, but with the latest advancements made by Microsoft, you can not only grab screenshots but also record the screen and even run optical character recognition (OCR) on images. Additionally, if you’re wondering how to take scrolling snapshot, this feature is now easier than ever with the right tools and settings.
So, if you’re wondering how to take a screenshot on Windows, you’ll be surprised to know that there are 7 ways you can use, read this write-up for all the available options.
Windows Snipping Tool
The most obvious and basic method to grab a screenshot or screengrab on Windows is using the Snipping tool. So, to get started with the Snipping tool on Windows, you can follow these steps:
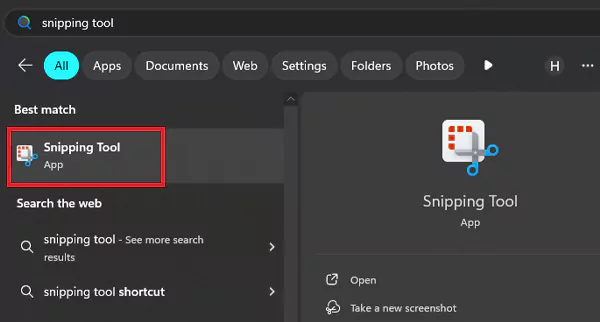
- Press the Windows key and type “snipping tool” in the search field. Open Snipping Tool.
- Click “New” to grab a screenshot.
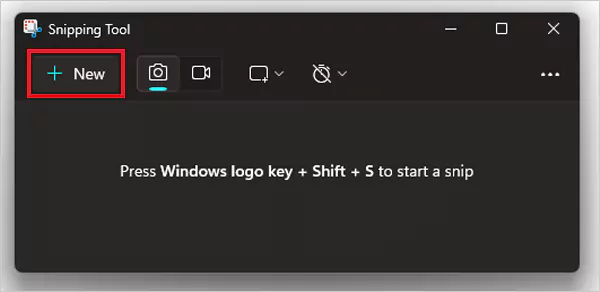
- Then, select the area you need to capture using the mouse, and the cropped image will be automatically copied to the clipboard.
- Once you’re done, you’ll get back to the Snipping Tool window with your selected screen grab. You can make any changes there using the options given.
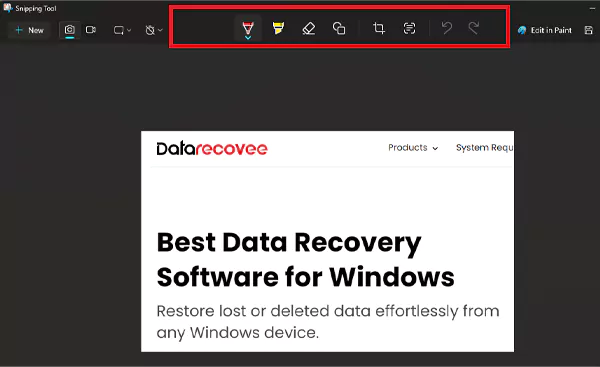
Save the changes and the screenshot using the Save button.
Windows Key + Shift + S
Pressing the Windows key + shift + S shortcut will directly allow you to take a screenshot through the Snipping Tool.
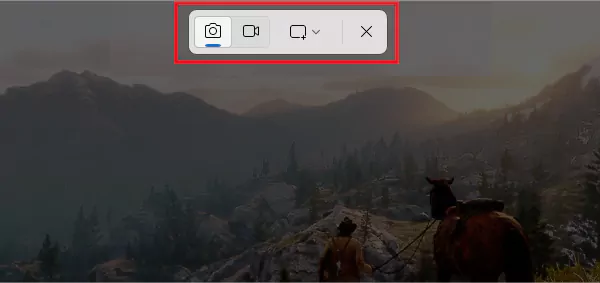
When you press the shortcut key for snipping tool, your screen will get dim and a tiny option panel will appear on the top. Then, you’ll be able to take a snip off of your screen and receive a message that it has been copied to the clipboard.
Also, if you change your mind and don’t want to keep the screenshot, just press the Escape key to back out.
PrtScn (Print Screen Key)
The PrtScn or Print Screen Key, is used to grab the screenshot of the whole screen. In this case, however, your clipped screenshot will not be saved as a file but will be copied to the clipboard.
Moreover, it is also possible to set the PrtScn button via the Snipping Tool option. First, open the Snip tool for Windows and go to Settings. There, you’ll find the option “Use the Print screen key to open screen capture” under the Shortcuts. Click Change in Window settings.

Then, go to Settings >> Accessibility >> Keyboard. Then, toggle on the option Use the Print screen key to open screen capture.

Windows Key + Print Screen Key
Another way to use the Print Screen key is by pressing it along with the Window key. With this option, you can take a screenshot, and it will automatically get saved to the hard drive of your PC.
The process follows the same style as taking a screenshot using the Windows key + Shift + S. The screen will get dim, and your saved PNG file will move to the folder Pictures >> Screenshots. Furthermore, the shortcut Alt + PrtScn can also work for some systems.
Pro tip: If your computer doesn’t have the PrtScn key, you can press the Fn + Windows key + spacebar to take a full screenshot.
Game Bar
Apart from the generic keyboard shortcuts, you can also use the Game bar to snap a screenshot. The shortcut key to open the Game bar is Win + G.
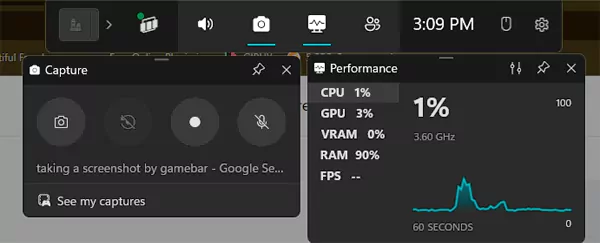
The Game Bar works effectively for screengrabs whether you’re playing a game or not. However, if you’re not able to open it using the given shortcut keys, you must enable it before that.
Go to: Settings >> Gaming >> Game Bar and turn on the toggle for “Allow your controller to open Game Bar.”

Power + Volume (on Surface Tablets)
Taking a screenshot on a Windows PC is pretty different from a Surface tablet because there’s no Print Screen key on the on-screen touch keyboard (you can connect an external keyword though).
Moreover, you can also screengrab using the Surface Pen by double tapping its back button.
So, to take a screenshot on a Surface Table (Surface Pros to Surface Pro 4), press the volume up and power buttons at the same time. However, if you’re using an older version, use the Fn + Windows Key + Space bar combination to take a screenshot.
Third-Party Screenshot Tool
There’s also an option of installing a third-party screenshot tool to your system if you like. You can find several screenshot applications available on the internet, with each having a unique feature.
For example, third-party screenshot tools allow you to take scrolling screenshots, meaning you can capture the parts that are not visible by scrolling down. Such screenshots are usually required when you’re capturing a web page.
Windows doesn’t have such a scrolling feature, but Microsoft Edge and Firefox do. Even though Google Chrome can also take such screenshots, you’ll have to change a Developer Setting.
Frequently Asked Questions
What is the shortcut key for Snipping Tool?
Is there a Snipping Tool in Windows 11?
Yes, Windows 11 has a Snipping Tool.
How to take screenshot on Windows 11 shortcut key?
To take a screenshot on Windows 11, just press the Windows key + Shift + S for a specific area or the Print Screen button to capture the whole screen.
How to take a cropped screenshot on Windows 11?
To take a cropped screenshot on Windows 11, press the Windows key + Shift + S.
Why is my Snipping Tool not working on Windows 11?
The most common reasons why the Snipping tool is not working on Windows 11 are that it isn’t installed or improperly installed, and you’re pressing the wrong shortcut keys for the purpose.

Related Posts
7 Best QR Code Generators for Small Businesses in 2026
QR codes are now a permanent way for small companies to communicate with clients. These scannable squares make it easy…
Data-Driven Strategies for Organizing Business Promotions
One of the most important factors that impact a business’s expansion and success is its ability to conduct successful promotions.…
Data-Driven Strategies for Achieving Financial Goals
This digital age has rewarded us with more information than we can manage. But you can’t use it just to…
How to Unhide Apps on iPhone? Quick Guide to Restore Hidden Apps
iOS 18 has launched so many new additions, but hiding iPhone apps has remained the talk of the town. Apple…
Data-Based Framework for Collaborative Planning
Planning often becomes inefficient, and the growth gets hindered—not because the teams do not have the ideas but because the…
Top Free Methods to Recover Deleted Word Documents for Students
Tomorrow is project submission, and here you’re scouring every drive and folder for the document. All of us have encountered…

How to Fix an iPhone Not Connecting to Wi-Fi?
Why can I not connect to Wi-Fi on my iPhone? It is frustrating, but the good news is that most…

Top 6 Observability Platforms for SRE Teams
With the rise of distributed systems, microservices, and cloud-native architectures, the sheer amount of telemetry data being generated is staggering.…
How to Remove a Directory in Linux?: Exact Commands and Safe Steps
Managing files and folders is a core part of working with Linux. One skill every user should know is how…