Go to System Settings > Lock Screen. Drag the slider for both “Turn display off on battery when inactive” and “Turn display off on power adapter when inactive” to Never.
How to Stop Mac from Sleeping? Tried and Tested Methods
Updated on: Jun 04, 2026
Table of Contents
- How to Stop Mac from Sleeping Using Built-in System Settings?
- How to Stop Mac from Sleeping Using the “Caffeinate” Command in the Terminal?
- How to Handle Special Sleep Scenarios on Mac?
- How to Schedule Custom Sleep and Wake Times on Mac?
- What are the Different Sleep Modes on Mac?
- To Sum It Up
- Frequently Asked Questions
If you are wondering how to stop Mac from sleeping during a movie or a heavy download/upload, the answer is just simple: adjust your display time to Never in your Lock Screen Settings.
But what if you want to stop Mac from sleeping for only an hour or even when the lid is closed? We are going to explain every method, covering all macOS versions and Mac models currently in use.
TL;DR
The quickest way to stop Mac from sleeping is to set your display timer to “Never” in your native Lock Screen or Energy Saver settings. For more precise control, you can use the Terminal caffeinate command for temporary or indefinite tasks.
How to Stop Mac from Sleeping Using Built-in System Settings?
Starting with System Settings is the best way to keep your system awake. To use the built-in methods for how to stop Mac from sleeping, you just need to go to your System Settings/Preferences and adjust the display and battery timers to Never.
Let’s see how to turn off sleep mode on Mac (all versions).
Modern macOS (Tahoe, Sonoma, and Sequoia)
In these versions, Apple moved to a “System Settings” interface that looks similar to an iPhone or iPad.
For MacBooks (Air & Pro)
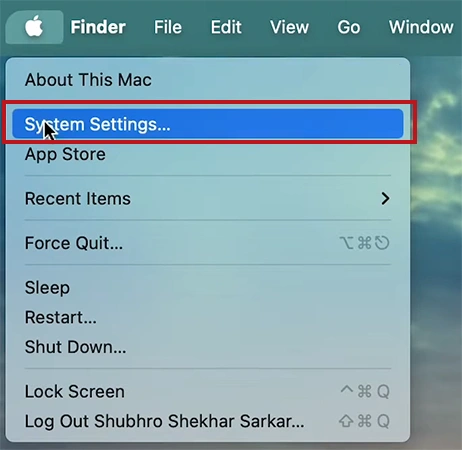
- Click the Apple Menu in the upper left corner and select System Settings

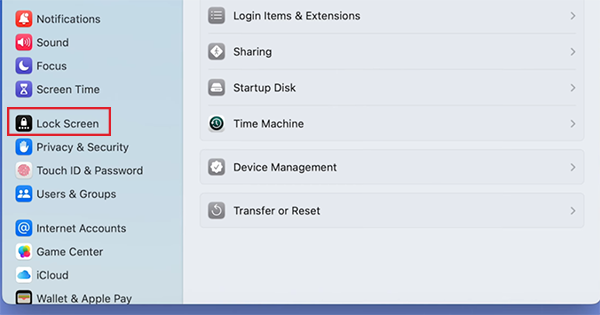
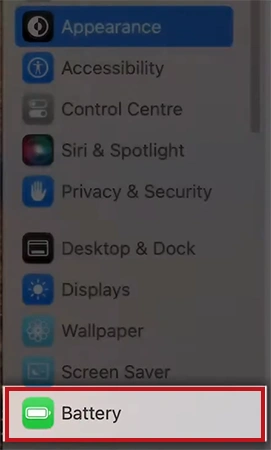
- Go to the Lock Screen in the left sidebar.
- Set both “Turn display off on battery when inactive” and “Turn display off on power adapter when inactive” to Never.

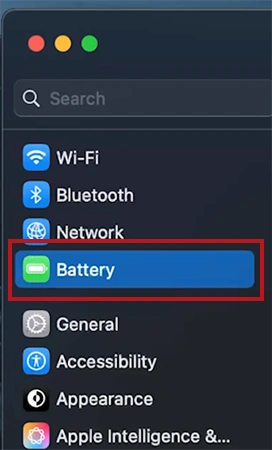
- Next, go to Battery in the sidebar.
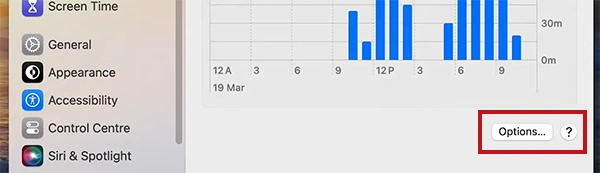
- Click Options.

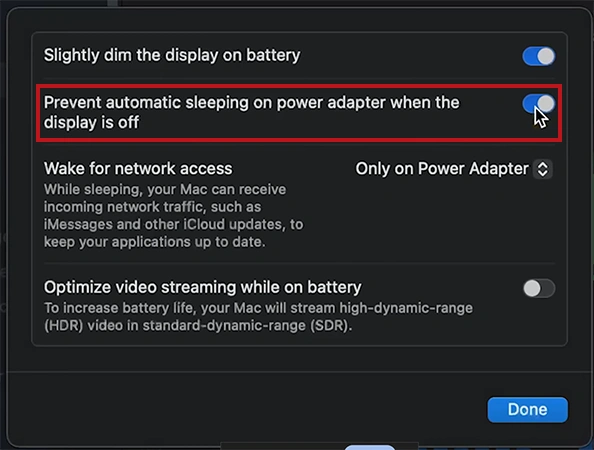
- Toggle ON “Prevent automatic sleeping on power adapter when the display is off.”
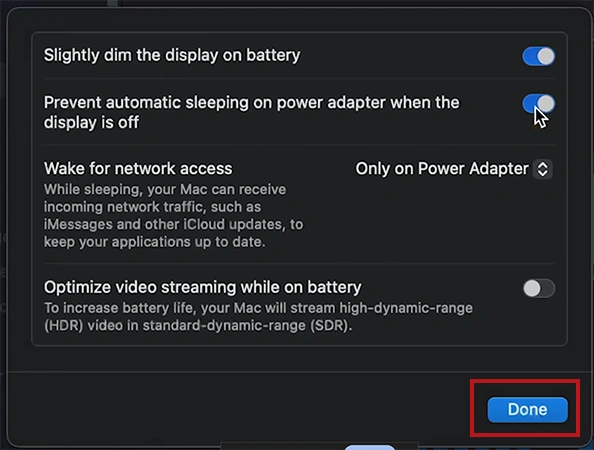
- Click Done.
For Desktops (iMac, Mac mini, Mac Studio)
- Go to the Apple Menu on the top left corner and choose System Settings or Open from the dock.

- Go to the Lock screen on the left sidebar.
- Change “Turn display off on battery when inactive” to Never,
- Select Energy in the sidebar.
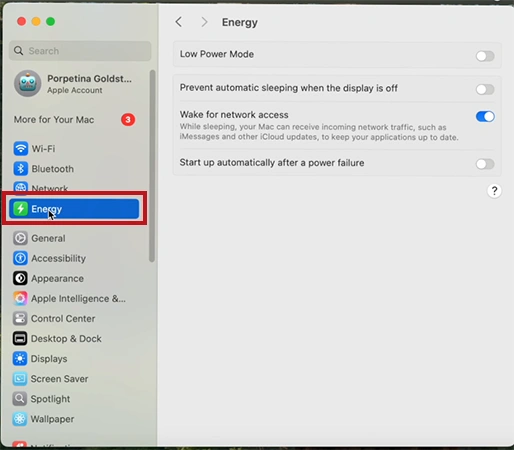
- Enable “Prevent automatic sleeping on power adapter when the display is off”.

Classic macOS (Ventura, Monterey, and Big Sur)
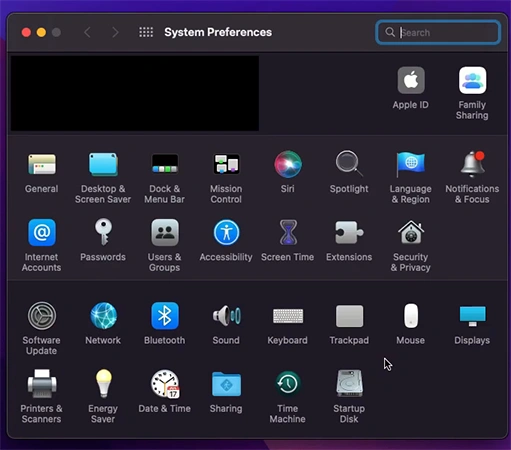
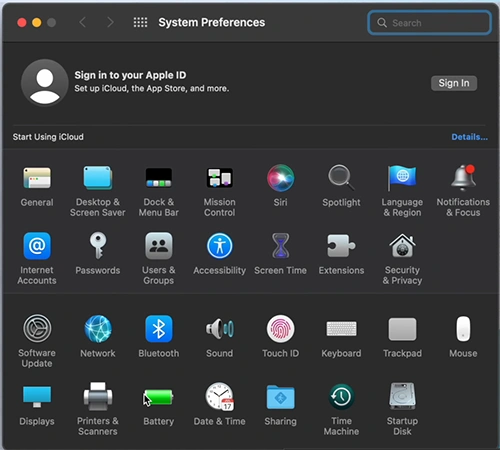
These versions use the “System Preferences” layout with a grid of icons.
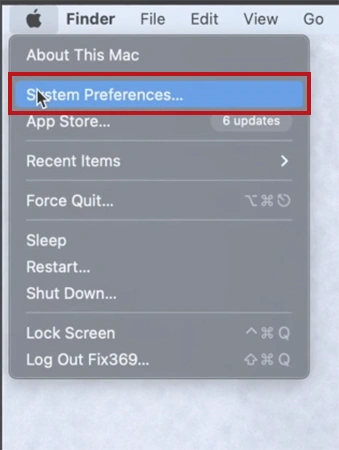
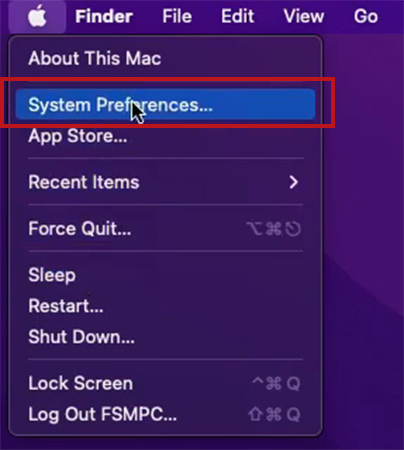
- Go to the Apple Menu on your MacBook and select System Preferences.
- Click the Battery from the left sidebar.
- Select Power Adapter in the sidebar.
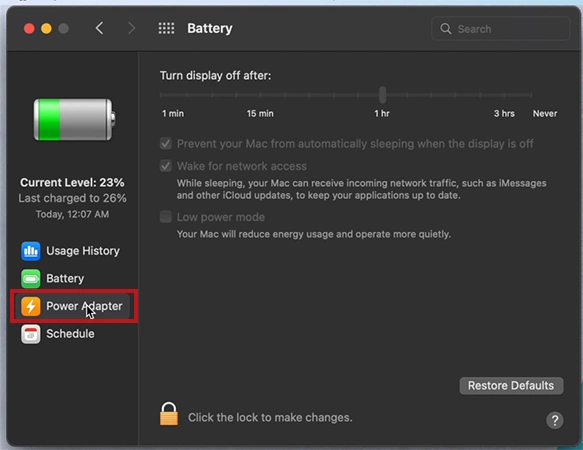
- Click on the Lock to make changes.
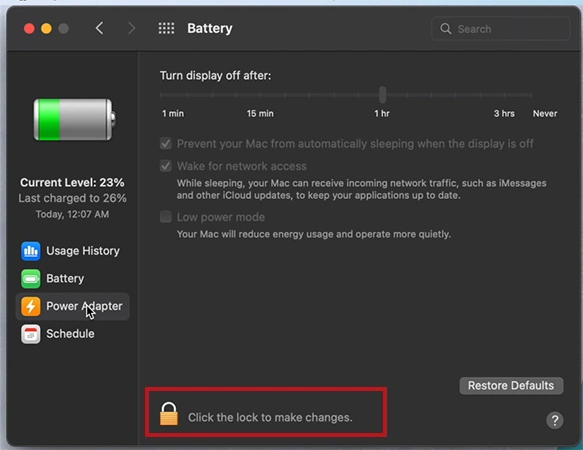
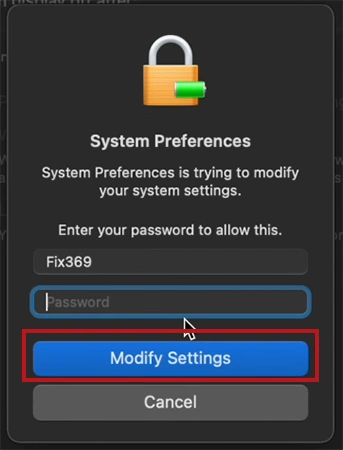
- Enter your Mac password and click Modify Settings.
- Drag the slider to Never.

- Check the box for “Prevent computer from automatically sleeping when the display is off”.

Legacy macOS (Catalina and older)
For older Macs running vintage software, all controls are in one place.
- Click on Apple Menu and select System Preferences….
- Click on Energy Saver (💡) from the grid.
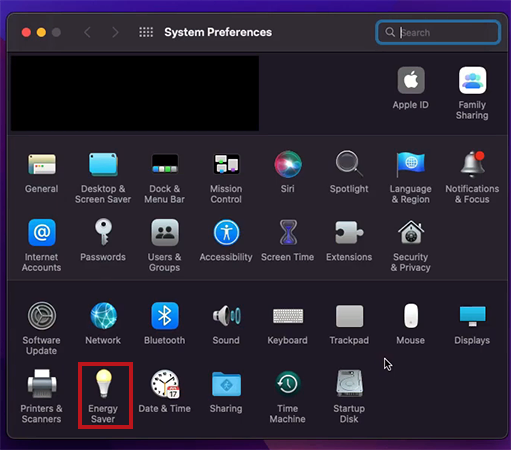
- You will see two tabs: Battery and Power Adapter.
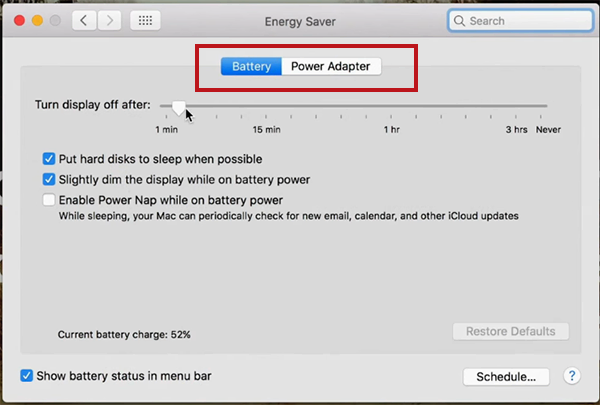
- In both tabs, drag the “Computer Sleep” slider to Never.

- Click OK on the warning pop-up.

You can also set the “Display Sleep” slider to Never as well, but the Computer Sleep slider is the one that prevents background tasks from stopping.
How to Stop Mac from Sleeping Using the “Caffeinate” Command in the Terminal?
Terminal commands are another way of keeping Mac from sleeping. For readers who want precision to stop Mac from sleeping without clicking through menus, the command line is the solution. To use Terminal for how to stop MacBook from sleeping, you need to use the built-in caffeinate command. It tells the system to ignore its usual energy-saving rules.
How Do You Keep Your Mac Awake Temporarily?
This is perfect if you only need your Mac to stay active for a set amount of time (for example, during a 2-hour download).
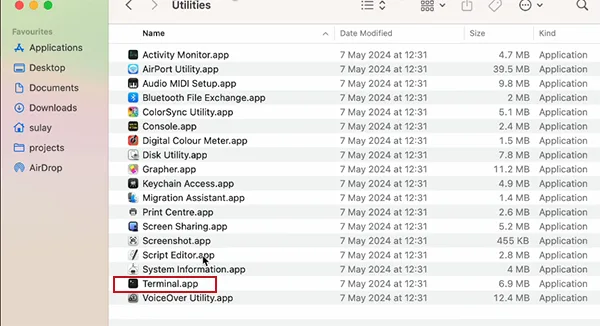
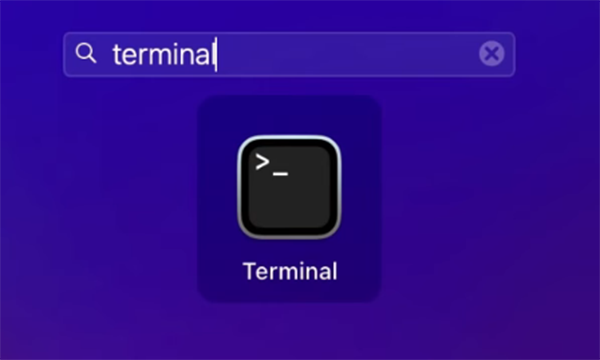
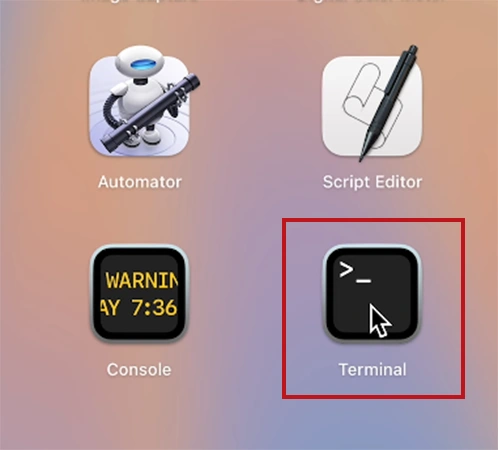
- Open Terminal (found in Applications > Utilities or via Spotlight search).
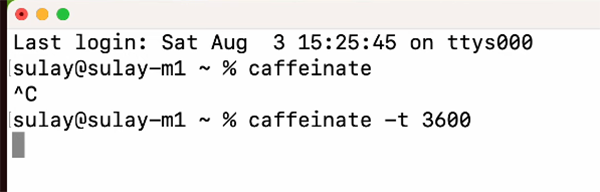
- Type the following command.
caffeinate -t [seconds]
In place of [seconds], enter the number of seconds you want to keep Mac from sleeping.

- Press Return.
Important: Keep the Terminal window open. Once the time runs out, the command will finish and your Mac will follow its normal sleep settings again.
How Do You Keep Mac Awake Indefinitely?
Use this when you don’t know how long the task will take and want to prevent the MacBook from sleeping until you manually tell it to stop.
- Open the Terminal.
- Type the following command to stop Mac from sleeping.
caffeinate -d
Here, -d stands for ‘display’. This keeps the MacBook’s display active.
- Press Return.
Your Mac will now stay awake for as long as that terminal window is open and the command is running.
How to Turn Off the Caffeinate Command?
When you are done and want your Mac to be able to sleep normally again, you must “kill” the process.
- Go back to the Terminal window where the command is running.
- Press Command (⌘) + C on your keyboard.

- The cursor will return to a new line. This shows that the command has stopped and your Mac’s standard energy saving rules are back.
How to Keep Mac from Sleeping while a Specific App is Running?
This is an advanced, useful method to stop Mac from sleeping and keep awake until an App is running. It tells your Mac: “Stay awake as long as this program is open, then go back to sleep as soon as it closes.”
- Open the Terminal.
- Type the following command.
caffeinate -w <pid>
Replace <pid> with the actual Process ID.
To link your sleep-prevention rules to a specific application, you first need to look up its unique Process ID (PID). Open the native Task Manager Mac utility and go directly to the CPU column. From here, note down the digits listed next to your running application before typing your command.
To get the Process ID: Open Activity Monitor (via Spotlight) > Find the App > Look at the number in the PID column.
- Press Return.
As soon as that process ends, the caffeinate command will automatically stop, and your Mac will go back to sleep.
The caffeinate command only works while its specific Terminal window stays open, so keep it tucked away to one side of your desktop. You can learn how to split screen on Mac to perfectly work on one screen and keep your active Terminal running in the other.
All these methods work identically across every version of macOS, from the newest macOS Tahoe to the earliest version of OS X.
How to Handle Special Sleep Scenarios on Mac?
Sometimes you don’t just want to keep your Mac awake while you are sitting in front of it. You might need it to stay awake the whole night while doing a backup or when the lid is closed.
In this section, we will see how to handle these specific situations and make sure your Mac stays wide open, completing your background tasks needed.
How to Stop MacBook from Sleeping When the Laptop Lid is Closed?
Closing your laptop lid is usually the ultimate command for your hardware to go to sleep immediately. But sometimes there could be a need to keep the Mac from sleeping with the lid closed while you connect it to a large external monitor and use it, or you’re running an overnight backup for which you are wondering how to make Mac not sleep.
You can keep your MacBook plugged to power, toggle the hidden “Prevent automatic sleeping” preference to keep your laptop fully active when the lid is closed. Let’s see how.
Modern macOS
These versions use the modern list-style System Settings layout. Here’s how to stop the MacBook from sleeping when the lid is closed:
- Click the Apple Menu in the top left corner and select System Settings.
- Scroll down the left sidebar and select Battery.
- Click Options.
- Toggle ON “Prevent automatic sleeping on power adapter when the display is off”.
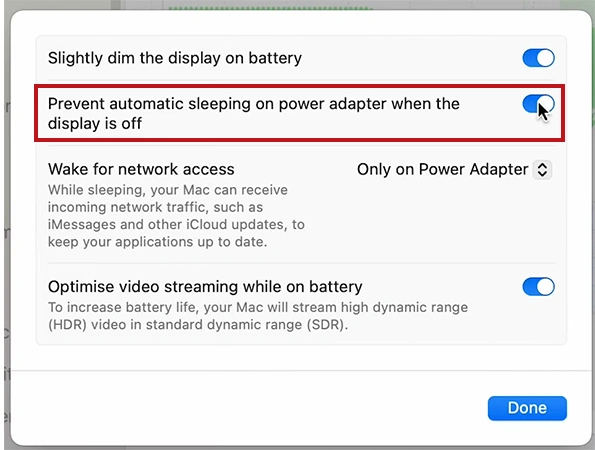
- Click Done to save.

Classic macOS
These versions have the older icon grid System preferences window showing a dedicated battery tab.
How to stop Mac from sleep while the lid is closed:
- Click the Apple menu and open System Preferences.
- Click the Battery icon.
- Select Power Adapter from the left-hand sidebar.
- Drag the “Turn display off after” slider all the way to the right to Never.
- Check the box next to “Prevent your Mac from automatically sleeping when the display is off”.
Legacy macOS
For vintage Macs, all power settings are consolidated into a single control panel. Let’s see how to stop Mac from sleeping with the lid closed.
- Click the Apple Menu and open System Preferences.
- Click the Energy Saver icon.
- Click the Battery tab at the top and drag the “Computer Sleep” slider all the way to the right to Never.

- Do the same in the Power Adapter tab.
- Check the “Prevent computer from sleeping automatically when the display is off” checkbox.
How to Schedule Custom Sleep and Wake Times on Mac?
You can set your Mac to wake up automatically a few minutes before you sit down, so your workspace is ready to go. Also, scheduling an automatic bedtime for your Mac cuts down on power consumption.
So, if you are running modern versions of macOS (Tahoe, Sequoia, Sonoma, Ventura), you must use the Terminal command line to schedule power time, while older versions (Monterey or earlier) have a simple built-in “Schedule” button in your System Preferences.
Below is the step-by-step breakdown for every model and software version to keep mac from sleeping by scheduling custom sleep and wake times.
Modern macOS (Tahoe, Sequoia, Sonoma, Ventura)
Apple removed the visual schedule manager from the System Settings graphical interface in these new versions. To create automatic timers now, you must use the pmset command in the Terminal app.
Open Terminal using Spotlight search and enter the following commands:
How to view your current power schedule:
- Enter the command:
pmset -g sched

- Press Return to see any existing wake or sleep events.
How to set repeating wake/power-on time:
- To make your Mac wake up automatically, use the format:
sudo pmset repeat poweron [Days] [Time]
For example, sudo pmset repeat poweron M 8:00:00 . This means wake every Monday at 8:00 AM.

- Press Return.
- Type your admin password to confirm.

How to set repeating sleep/shutdown time:
- To put your Mac to sleep, use the format:
sudo pmset repeat sleep [Days] [Time]
For example, sudo pmset repeat sleep MTWRF 23:00:00 . This means sleep every weekday night at 11:00 PM.

- Press Return.
- Enter your Mac’s Administrator password.

How to clear all custom schedules:
- If you want to erase your automated power routines and return to manual controls, run:
sudo pmset repeat cancel
- Press Return.
Classic macOS (Monterey or earlier)
If your computer runs an older OS, Apple provides a very convenient graphical scheduler right inside the settings grid.
- Click the Apple Menu and open System Preferences.
- Select the Battery icon (on MacBooks) or Energy Saver icon (on desktop iMacs/Mac minis).
- Click Schedule.

- Check the top box to configure a Start up or wake schedule. Use the dropdown boxes to select the frequency and enter your preferred time.

- Check the bottom box to configure a Sleep, Restart, or Shut Down schedule. Use the dropdown boxes to select the frequency and enter your preferred time.

- Click Apply (or OK) to save your routine.

What are the Different Sleep Modes on Mac?
macOS has 3 main power states:
- Standard Sleep (Mode 0), which keeps the system RAM fully powered,
- Safe Sleep (Mode 3), which saves data to your drive but leaves RAM active, and
- Deep Hibernation (Mode 25), which entirely cuts power to RAM for maximum battery savings.
Understanding these modes will help you to balance how fast your Mac wakes up versus how much battery it drains while sitting idle.
| Sleep Mode | Name | Wakeup Time |
| Mode 0 | Standard Sleep | Instant |
| Mode 3 | Safe Sleep | Fast |
| Mode 25 | Deep Hibernation | Slower |
How to Check the Current Sleep Mode of a Mac?
- Open Terminal (Applications > Utilities).
- Enter the following command:
pmset -g | grep hibernatemode
- Press Return.
- The terminal will return a number like hibernatemode 3.
How to Change Sleep Modes Via Mac Terminal?
- Open Terminal Using Spotlight search (or Applications > Utilities).
- Type the following command:
sudo pmset -a hibernatemode X
Replace X with the mode number.

- Press Return.
- Type your Mac’s administrator password and press Return.

To Sum It Up
Every generation of hardware has a clean solution to override Apple’s native power conservation rule. As discussed by Datarecovee, by using the built-in preferences or command line flags, you can easily stop your Mac from sleeping.
So, as per your requirements, choose the native UI or Terminal method and prevent Mac from sleeping.
Frequently Asked Questions
How do I make my Mac screen stay on?
How do I deactivate sleep mode?
Open Terminal and type caffeinate -d, then hit Return. Keep the Terminal window open to completely deactivate the system and display sleep. Press Command (⌘) + C to turn it off.
How to change sleep mode on Mac?
To change sleep mode on Mac: open Terminal and enter sudo pmset -a hibernatemode X, replacing X with 0 for Standard Sleep, 3 for Safe Sleep, and 25 for Deep Hibernation. Press Return.
How do I turn on the always-on display on Mac?
There are 2 ways to turn on always-on display on Mac (i.e., keeping mac from sleeping):
- Go to System Settings > Lock Screen and set your display inactivity timer to Never.
- Open Terminal and type the command: caffeinate -d. Press Return.
How do I put my Mac to sleep with the keyboard?
MacBook Keyboard shortcuts to sleep:
- On Built-in keyboards without Touch ID:
- Control + Shift + Power button
- Control + Power button
- On Built-in keyboards with Touch ID:
- Touch ID button
How to prevent Mac from sleeping when the lid is closed?
Go to System Settings > Battery. Toggle ON “Prevent automatic sleeping on power adapter when the display is off” to keep Mac from sleeping when the lid is closed.
Does my Mac stay awake while the screensaver is running?
No, the screensaver does not block system sleep. So, your Mac is still in sleep mode even when you see the screensaver.
What is the difference between display sleep and computer sleep?
Display sleep only turns off the screen backlight to save power. Computer sleep pauses the actual processor (CPU), operations, network connections, etc., which stops your background tasks completely.

Related Posts
Sorry, No post were found