You can use Windows + PrtScr, Alt + PrtScr, and Windows + Shift + S hotkeys to take a screenshot on any Dell device.
How to Screenshot on Dell Computers? 3 Quick Ways
Updated on: Jun 04, 2025
Need to learn how to screenshot on Dell computers? Whether you are sharing work, saving information, or solving a tech issue, knowing how to quickly capture your screen can make things easier.
It is not rocket science to take a screenshot on Windows, but you should be aware of the most effective method to save time and increase your productivity.
My daily work requires me to take a lot of screenshots, so you can trust that I am the right person for this. In this guide, I will show you 3 simple ways to learn how to screenshot on a Dell laptop or desktop.
How to Take a Screenshot on Dell Computers Using the Print Screen Key?
Most Dell computers, like any other Windows system, have a Print Screen key near the top row of the keyboard, usually next to the Function keys. It might be labeled in different ways, like PrtSc, PrtScrn, or PrtScn.
Here’s how to take a screenshot on a Dell computer using the Print Screen key:
1. Open the screen, webpage, or app you want to capture.

2. Find the Print Screen key and press it to capture the whole screen, or you can also press Alt + PrtScr to capture just the active window.

3. Now, the screenshot is copied to your clipboard. You can paste it (Ctrl + V) into an email, document, or any image editing app.
If the Print Screen key is printed below a function key, just hold Fn and press the key. If you want to save the screenshot as a file, press Windows + PrtScr. This will save it directly in the Pictures > Screenshots folder.
How to Screenshot on Dell Computers Using Snipping Tool?
The Snipping Tool is a built-in Windows feature that allows you to capture screenshots in different ways. It is easy to use and offers options for custom screenshots.
So, how do you do a screenshot on a computer using the Snipping Tool? Let’s find out:
1. Quick Screenshot:
Press Windows + Shift + S; this will dim your current screen. You can then click and drag to select the area you want to capture. The shot will be available on your clipboard, and you can paste it anywhere.

2. Custom Screenshot:
- Type ‘Snipping Tool’ in the search bar and open the app.

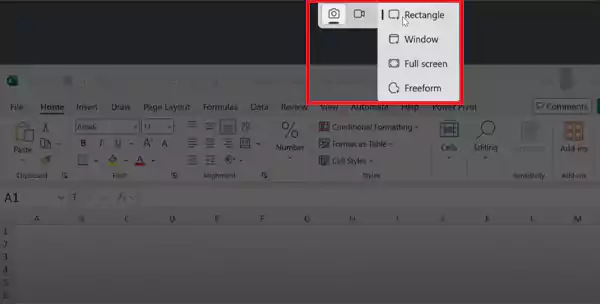
- Select a mode from the top toolbar:
- Rectangle: Capture a rectangular area.
- Free-form: Draw a custom shape.
- Window: Capture a specific window.
- Full-screen: Capture the entire screen.
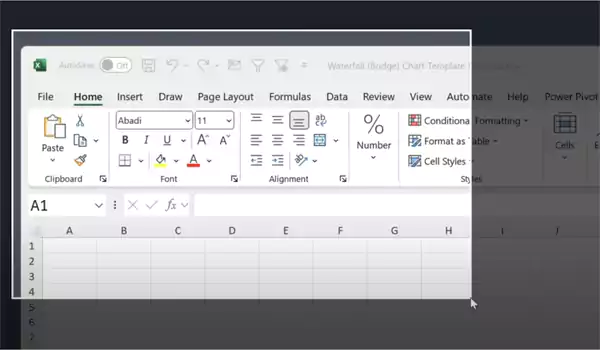
- Click and hold your mouse to select the area and release to capture it.
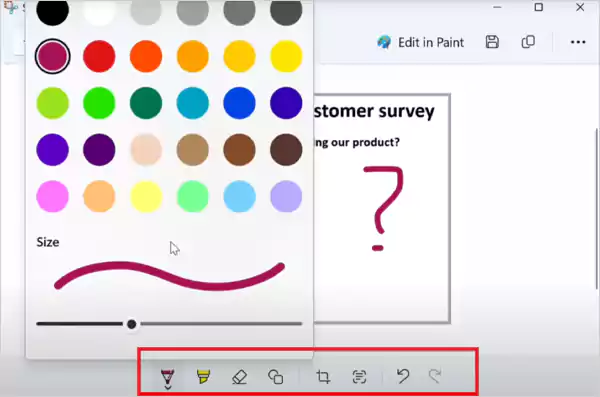
- Once captured, the tool allows you to add annotations. You can draw freehand, highlight areas, remove marks, and add text.
- After you are done with the editing, click on ‘File’ and select ‘Save As’ to save it on your Dell computer.
Furthermore, you can also use the ‘Share’ button to send it directly through email or messaging apps.
How Do You Screenshot on a Dell Laptop Using Third-Party Tools?
If the built-in screenshot tools on your Dell desktop feel too basic, you can try some helpful tools that make things quicker and easier. These tools let you capture your screen, edit your shot, and share it right away.
If you are still confused about how to screenshot on a Dell desktop using advanced third-party tools, here are a few solid options:
1. Lightshot: It is a simple and free tool to take screenshots on Windows, Mac, or through a Chrome extension. You can capture the screen, edit the image, and share it instantly using a short link.
2. ShareX: It is a powerful and open-source app for Windows that allows you to take screenshots or record your screen. It supports fast uploads to different platforms to make sharing easy.
3. Snagit: It is a screen capture and recording tool for Windows and Mac. It is one of the best tools for professionals and teams. You can record videos, edit screenshots, and use different templates.
These tools work smoothly on Dell laptops and desktops. Just install them once, and you are good to go.
Where to Find Your Screenshots on Dell?
Now that you know how to screenshot a Dell laptop or desktop, let’s find out where screenshots are saved in Windows or Dell computers. Pressing PrtScn copies the screenshot to the clipboard. You can paste it into an app like Paint and then save it in your preferred location.
When you use the Snipping Tool, it copies your screenshot to the clipboard. Plus, a preview will pop up, allowing you to save it by clicking the save icon or pressing Ctrl + S.
If you use the Windows + Print Screen keyboard shortcut, a full-screen screenshot will be saved as a PNG file. Go to Pictures > Screenshots and locate your file.
Bonus Tip: If you take multiple screenshots, enable Clipboard History on Windows to access and paste them anytime.
Wrapping Up
To sum it up, you can take screenshots on your Dell PC using the Print Screen key, Snipping Tool, and various third-party tools. Each has its own advantages, and the best choice depends on what you need.
Knowing all these methods can be helpful in many situations, from work and school to tech support. I hope that now, with the help of this guide, you are fully aware of how to screenshot on Dell computers.
Frequently Asked Questions
What is the shortcut for a screenshot on a Dell PC?
How to screenshot on Dell laptops without the Print Screen button?
Press Windows + Shift + S or open the Snipping Tool from the Start menu to capture the screen. Plus, you can also utilize a reliable third-party tool.
How to screen record on a Dell?
Use Windows + Shift + R to launch the tool on Windows 11. Here, click on New and select the Record option.
How to take a screenshot in Windows 11?
You can use the Print Screen button, Snipping Tool, Xbox Game Bar, and other third-party apps to take a screenshot on Windows 11.

Related Posts

8 Best AI Presentation Makers for Business-Ready Slides
Making a presentation doesn’t just mean designing slides. It’s about defining a clear structure, using defined logic, useful visuals, and…

Queue Management Software Troubleshooting Guide: 8 Common Faults and Fixes
The long wait times and ineffective management of customer queues can have a significant impact on customer satisfaction and business…

How to Use Similarweb Website Traffic Data for Competitor Research
Competitor research without traffic data is guesswork. You can guess who your rivals are, guess how big they are, guess…

Choosing the Right Hosting Model for Scalable Digital Platforms
The performance of digital business is directly related to website speed, uptime, and scalability. Slow page performance has a negative…

How Data-Driven Performance Tools Are Transforming Employee Recognition in Tech Companies
“People work for money but go the extra mile for recognition, praise, and rewards.” — Dale Carnegie (Writer & Teacher)…

Why Businesses Struggle to Collect Reliable Data from the Web
Almost every company that depends on data runs into the same problem: although they can find the data they need,…

Why Financial Data Recovery Matters for Businesses
Financial data supports every part of a business, directly affecting cash flow, payroll, tax reports, audits, customer billing, and daily…

CMMC Compliance Is Coming for Manufacturers. Here Is What You Need to Do
“Cybersecurity is much more than a matter of IT.” — Stephane Nappo (Cybersecurity Professional) For manufacturers working within the defense…

How Data-Based Tools Influence Learning Performance
Learning has transformed in the modern age with the integration of new technologies to help students and professionals prosper in…