The standard diagnostic test on Mac takes from 2 to 5 minutes, and the extended Mac diagnostics test can take hours to complete.
How to Run Diagnostics on Mac? (Apple Silicon and Intel)
Is your Mac lagging, crashing unexpectedly, or refusing to boot properly? Before you spend money on a repair shop, Datarecovee is here to help. You can use built-in testing tools to pinpoint the exact issue.
This guide has been fully updated for 2026 to include the latest hardware architectures and troubleshooting processes. Inside, we break down exactly how to run diagnostics on Mac for all Mac versions, including legacy machines or the newest MacBook Neo.
Let’s safely scan your system for internal component failure.
Key Takeaways:
- Architecture Specific Steps: Clear step-by-step instructions to run a Mac hardware scan on Apple Silicon and Intel-based Macs.
- Legacy Support: How to run diagnostics on Mac, the vintage Apple Hardware Test (AHT) on older machines built before June 2013.
- Error Decoding: How to read and interpret Apple’s alphanumeric reference codes so you know what exactly is broken.
How to Run Diagnostics on Mac? An Explaination
Running a diagnostic test on Mac helps you identify hardware and battery issues or system bottlenecks in just a few minutes. Whether your Mac is lagging or refusing to start properly, Apple’s built-in testing tool can pinpoint the exact cause of the problem.
For a successful hardware check on Mac, the process is divided into three phases:
Phase 1: Prepare Mac for Diagnostics
Before starting any hardware test on Mac, you must properly prepare your hardware so that you get accurate results and no interruptions in between the process.
- Install the latest macOS updates before continuing.
- Plug your Mac into a reliable power outlet.
- Unplug all external peripherals: hard drives, displays, headphones, etc., except your keyboard, mouse, and power cable.
- Place your Mac on a hard, flat, stable surface with good airflow.
Phase 2: Start Apple Diagnostics
Once all is set, the next step is to run diagnostic test for Mac. The exact method to boot into the diagnostic environment depends on the age and processor of your Mac. Determine whether your Mac is the one with an Apple Silicon or an Intel chip. Next, follow the steps for MacBook diagnostics.
Phase 3: View Apple Diagnostics Results
Once the Mac HW test finishes (usually taking between 2 and 5 minutes), the system will display its findings on the screen.
- Note down the alphanumeric codes provided by the system after hardware check on Mac (such as ADP000, PFR001, PPM001, etc).
- Read the onscreen summary to understand which component of Mac requires attention.
How to Run Apple Diagnostics on Apple Silicon Macs (M1-M4)?
If you need to perform a Mac hardware scan on a modern Apple Silicon computer (including M1, M2, M3, or M4 chips), the built-in method makes it simple to execute diagnostic test for Mac systems.
Follow these steps to start the Mac diagnostics process on your modern machine:
- Prepare your Mac: Plug your Mac into a reliable power outlet and remove any peripheral device except the Mac keyboard and mouse.
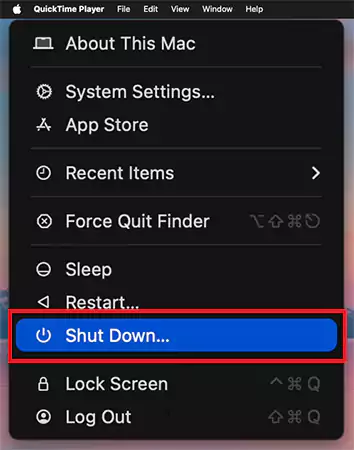
- Perform a Hardware Shutdown: Go to the Apple menu and select Shut Down. Wait for the screen to turn off completely black and all lights to go off.
- Press and Holding Power button: Do not just tap the Power button. Press and hold the Power button (Touch ID button). Keep holding it down until you see the message “Loading startup options.”

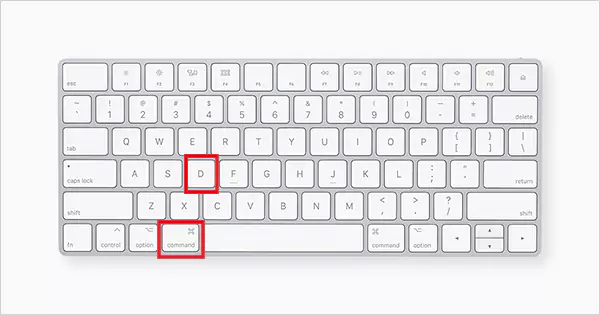
- Press and Hold Command (⌘) + D: Press and hold the Command (⌘) + D keys simultaneously on your keyboard.
- Wait for Diagnostics Screen to Load: The Mac will boot into the specialised test mode and open the diagnostic menu.

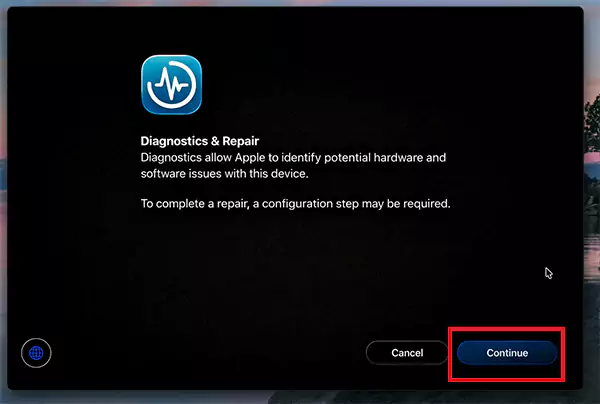
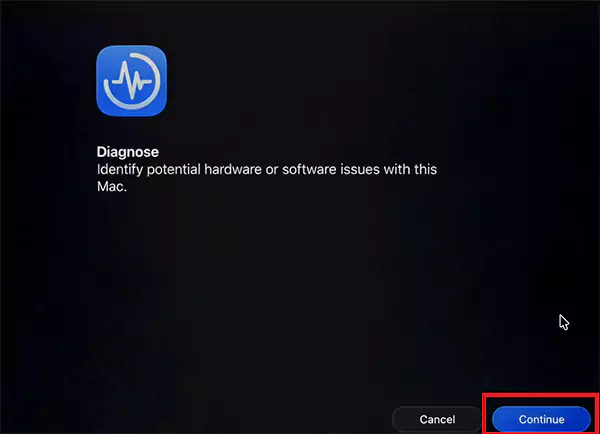
- Continue: Once you see the Diagnostic & Repair window, click Continue.
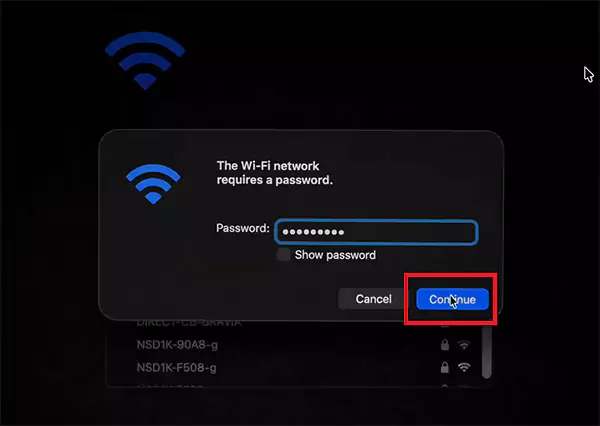
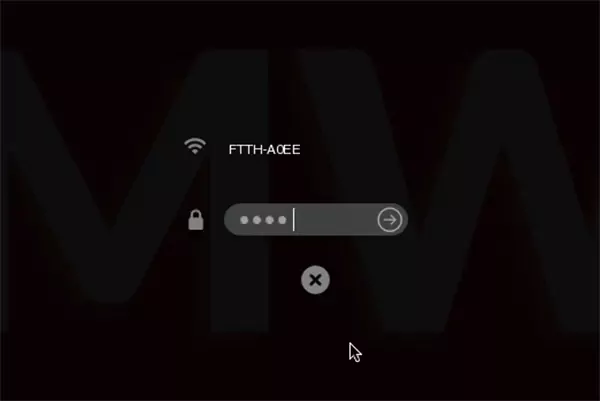
- Connect to WiFi: Choose a WiFi network and click Continue.
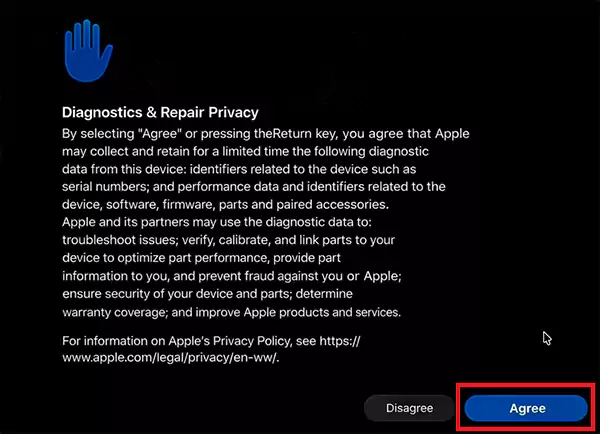
- Agree Privacy Policy: Click Agree on Diagnostic & Repair Privacy.
- Begin the Diagnostic Scan: Click the Continue button to begin the diagnostic test for Mac.
- Diagnosable Elements: You will see the diagnostics menu with the list of all the elements that you can diagnose.
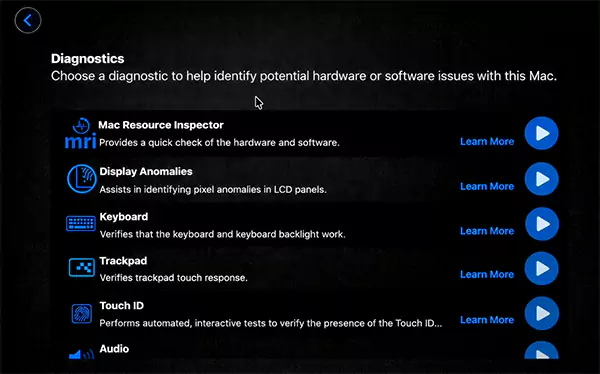
- Diagnose the Element: Press the play button (▶︎) next to the element to start the hardware test on Mac.

- Wait for the Process to Complete: Wait until the Mac Diagnose Inspector completes the process.
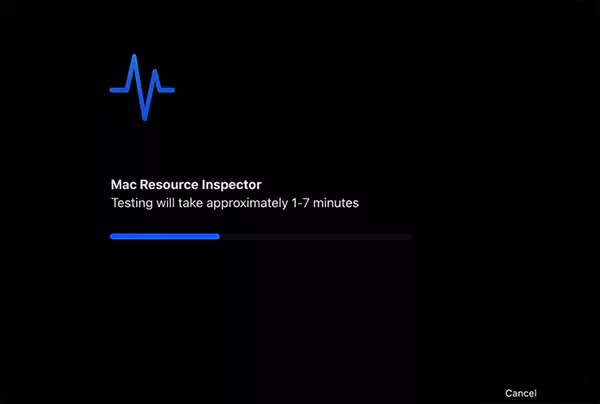
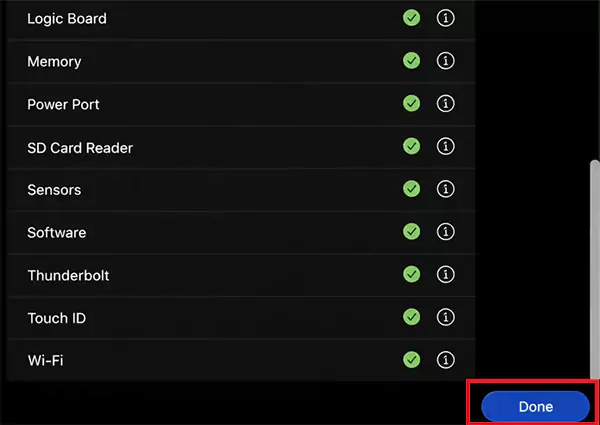
- Diagnostics Results: Once the Mac hardware scan is complete, you can check the elements that passed or failed.
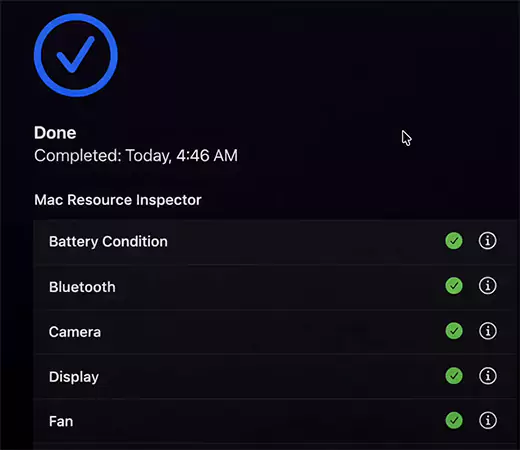
- Close: Finally, click the Done button to close the Mac hardware test software.
How to Run Apple Diagnostics on Intel-Based Macs?
If your machine runs on an Intel processor, executing a diagnostic test for Mac hardware requires a specific keyboard shortcut during the boot process. This section covers how to run diagnostics on Mac with Intel chips, split by the age of the machine.
Intel Macs (2013-2020)
For modern Intel machines, Apple uses its standard native Mac hardware test software to run the Mac hardware test.
- Prepare your Mac: Before the test begins, connect your Mac to a power source and remove any peripheral devices connected (except Mac keyboard and mouse).
- Shut Down Mac: Go to the Apple menu and select Shut Down to turn off your Mac completely.
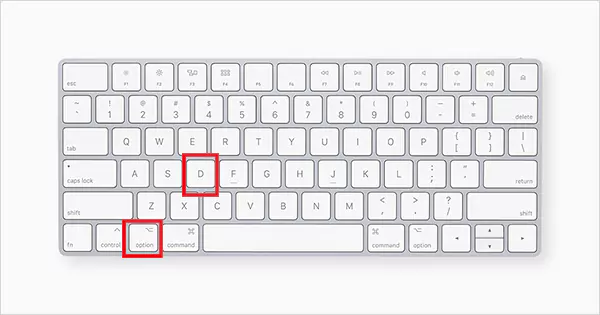
- Enter Diagnostic Mode: Press the Power button and immediately press and hold the D key on your keyboard.
- Release the Key: Release the key when you see a progress bar or a language selection screen.

- Alternate Option: If using the D key doesn’t work, press and hold Option (⌥) + D to run the hardware check MacBook test.
- Connect to WiFi: Enter the password and connect to the WiFi. Press Return.
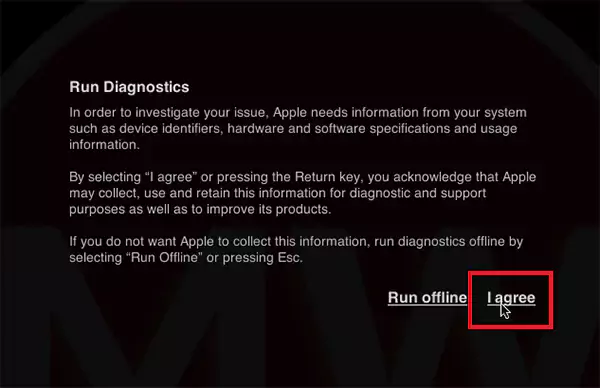
- Run Diagnostic Permission: Click I Agree on the Run Diagnostics screen to grant permission to use and retain the information for diagnostics and support purposes.
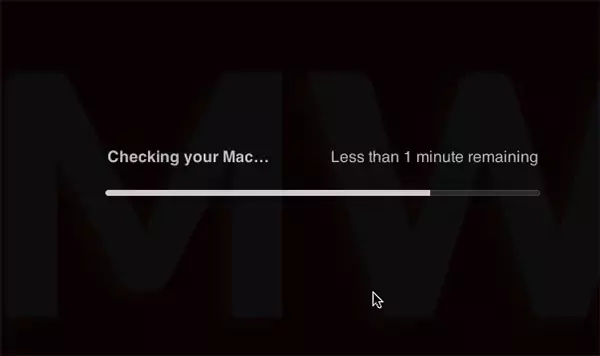
- Diagnostics Process Starts: Your Mac diagnostics test will start. It will take a few minutes to complete.
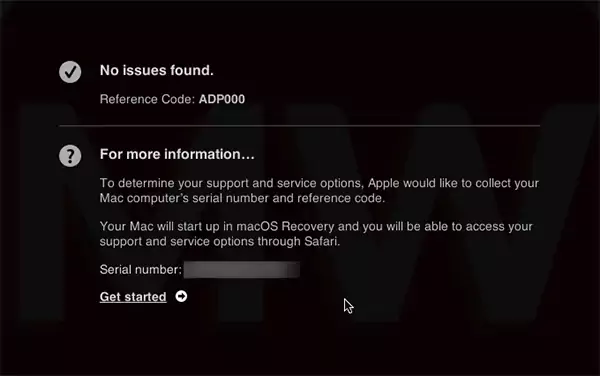
- Diagnostic Results: Once the process is complete, all the issues found will be displayed with their alphanumeric codes on the screen.
Old Versions (Pre-June 2013)
If you are troubleshooting a legacy machine, it depends on the legacy Mac OS X hardware test environment, earlier known as Apple Hardware Test (AHT).
- Prepare the Mac: Unplug all external connections, leaving the essential ones connected, such as keyboard, power cable, and the mouse.
- Install DVD: For very old machines, you must insert the original OS X Install DVD (Disc 2) to launch this specific Mac HW test.

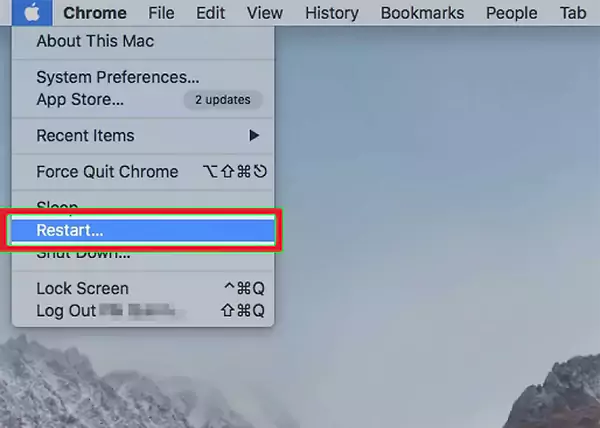
- Restart the Mac: Go to the Apple menu and select Restart. Click Restart again to confirm.
- Hold the D Key: Immediately press and hold the “D” key.

- Choose Language: Once the grey AHT console loads, you will be prompted to choose your language. If you don’t have a mouse attached, use the up and down keys to select a language and click the Next (→) button (or press the Return key).

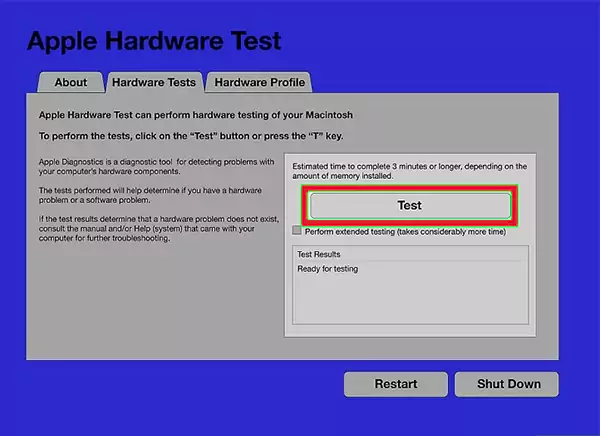
- Start the Test: The Apple Hardware console appears. Click the test button or press the “T” or the Return key.
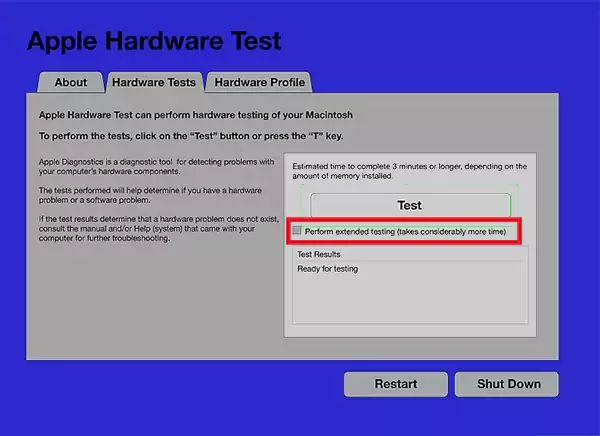
- Perform Extended Testing: Check the box against Perform extended testing if you want to check everything on the Mac.
- Diagnostics Complete: Once the Mac hardware test has been run, look for the error code listed. Make sure to note it down so you can provide it to the Apple Authorized Service Provider.
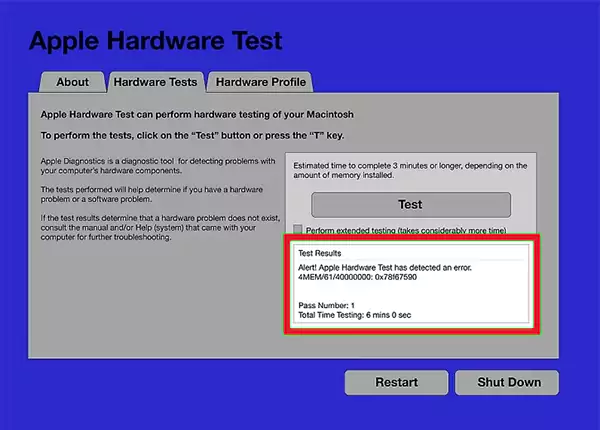
In between the tests, if you want to stop the test, click on the Stop Test button or press “T” again.
Conclusion
Running built-in diagnostics is the fastest way to pull back your Mac’s performance and protect hardware from bugs. By understanding how to trigger these native methods across different Apple architectures, you save hours of troubleshooting time.
Final Takeaways:
- No issues found: If you get ADP000, focus your attention on the software. Try wiping corrupt software or managing background storage apps.
- Hardware issues found: Take a screenshot or write down any alphanumeric reference codes before booking a repair appointment.
- When to seek help: If your diagnostics point to any failing issue, do not attempt a DIY fix.
Frequently Asked Questions
How long does a diagnostic test on Mac take?
How to run diagnostics on Mac?
To run diagnostics on Mac:
- Apple Silicom (M1-M4): Shut down > Hold Power until startup option appears > Press Cmd + D.
- Intel Macs (2013-2020): Shut down > Press Power and hold the D key until you see a progress bar.
- Intel Macs (Pre June 2013): Install DVD (Disc 2) > shut down > Press Power and hold the D key until the grey Apple Hardware Test icon appears.
How to diagnose issues with Mac?
To diagnose issues with Mac:
- For hardware, run Apple Diagnostics to check the components.
- For Software, use Activity Monitor or the Console app inside macOS.
What is a Mac hardware test?
Mac hardware test is a built-in Apple diagnostic utility. It scans internal components like RAM, battery, fan, and logic boards for defects.

Related Posts
Mac Tahoe vs Sequoia: Which macOS Version Should You Choose?
Choosing between macOS Tahoe and Sequoia comes down to more than just getting the newest version. While Tahoe introduces a…
How to Fix Slow Boot Mac: 10 Proven Ways to Improve Startup and Performance
Why is my MacBook running so slowly? This is one of the most asked questions I get. Well, a Mac…
How to Get Path of a File in Mac? (5 Simple Methods)
Need to paste a file path into Terminal or share a file’s exact location, but don’t know how to get…

How to Exit Full Screen on Mac (4 Easy Methods)
Full Screen mode on a Mac helps you focus by hiding the dock and menu bar. But there are times…
Where is System Preferences on Mac? How to Open and Use It
If you are looking for System Preferences on Mac but can’t find it, you are probably using a newer version…

How to Right click on a Mac? Learn the 7 Tried and Tested Methods
Being a first-time MacBook user can be a bit challenging at times because you might be just practising new sets…

How to Clear RAM on Mac: Easy Ways to Free Up Memory
If your Mac is freezing, slowing down, or showing the “Your system has run out of application memory” warning, memory…
Clipboard History Mac: How to See and Manage Copied Items
Correct me if I am wrong, but most users do not think about the Mac clipboard until something important disappears.…

How to Check CPU Usage on Mac? (Tried and Tested Primary Method)
New Mac devices usually run smoothly, but over time, you may notice apps taking longer to open, the system heating…